Entering a New Patient, Step 3: Patient Communications

At the bottom left of the Main tab of the Patient Form you will find a panel titled “Patient Communications (Addresses, Emails, Phones)”. It is here that you can record an unlimited number of, you guessed it, street addresses, email addresses, and phone numbers.

Notice the “New” icon on the left side of the toolbar at the top of the Communications panel. Use the little arrow just to the right of the icon to select the type of information you want to add.

You can add information in any order you like, but we’ll just start with an address. The City field is a pick list. After a while all the combinations you normally use will be in the list. Type a couple of letters of the desired city to quickly get to the right part of a long list. Use the “New” button at the bottom to add a new City-State-Zip.

Use Save and Close in the top toolbar (or the <Ctrl><Return> hotkey) to save your new address and return to the patient’s Communications list.

Use the same steps to add additional addresses, emails, and phone numbers. If you put more than one of any type into the list, SOS will mark the first one you enter as the “default”. You can designate a different entry to be the default by highlighting your choice and clicking the star icon in the toolbar at the top of the Communications panel. Your designated default in each category will be highlighted green. If you make a mistake, just make sure that the last one you click is the one you want to be the real default. If you save and refresh the screen (using the icons in the top toolbar), you will see that only one entry in each category shows as the default. If there is only one item in a category, the system will mark it the default when you save the patient form.

Previous:

Entering a New Patient, Step 2: Basic Demographic Data Fields

Next:

Entering a New Patient, Step 4: Contacts

Other Articles in this Series:

Entering a New Patient, Step 1

Related Articles:

Managing Patient Insurance Payers
Managing Patient Non-Insurance Payers
Managing Patient Care Episodes
Managing Patient Posted Charge Entries
Managing Patient Posted Payments and Adjustments
Recording Patient Psycho-Social History
Managing Billing and Clinical Documents for a Patient
Creating a Patient Treatment Plan
Recording Progress Notes
Recording Prescriptions
Recording Allergies
What Are User-Defined Fields?

Managing Patient Non-Insurance Payers

You can link a single patient account link to any number of non-insurance payers, including the patient herself, a family member, an attorney, a grant agency or any other person or organization. Likewise, you can link many patients to a single non-insurance payer.

To set up the non-insurance payers on a patient account, start by opening up a patient’s list of Non-Insurance Payers as follows:

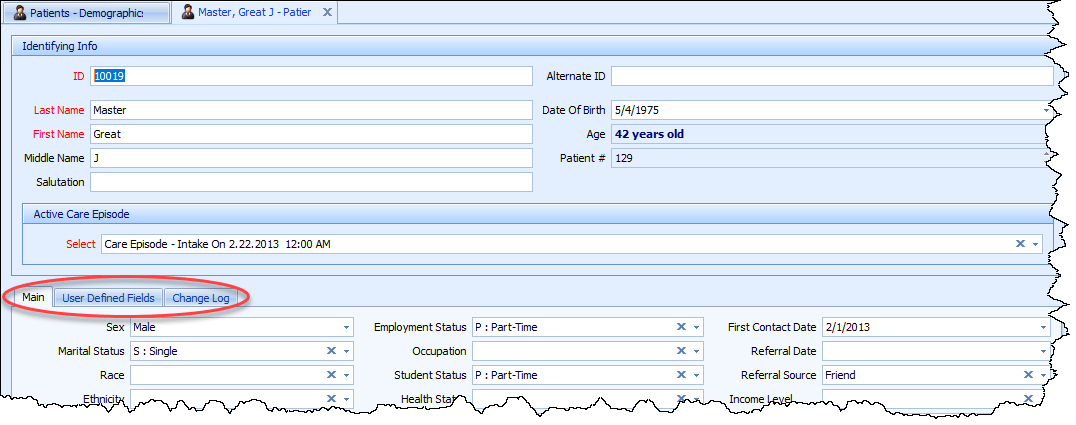
  1. In the Navigation Bar on the left side of your screen, expand Patients, then select Patients or Patients – Billing.
  2. Locate the desired patient in the list and double-click it to open it.
  3. In the lower part of the Patient screen, select the Payers tab.
  4. On the Payers tab, select the Non-Insurance Payers tab.

Add the Patient as a Payer on the Patient’s Account

Most often, children are not payers on their own accounts, but when the patient is an adult, she will almost always be responsible for some charges, even if she has good insurance. For this reason, one of the first tasks when setting up her account will be to see that she is a listed payer. For your convenience, SOS provides a button to do just that.

When you click this “Create Patient Payer” button, a new row will appear in the Payers list, showing that the patient is responsible for 100% of the charges not covered by insurance. Double-click this new row to adjust any of the payer settings you would like. There are actually only three:

  • Percent responsibility for non-insurance charges.
  • Whether or not to charge interest for unpaid balances.
  • Whether or not to hide this payer in the payer list on a new charge entry for the current patient.

Note that there are some other options, such as whether to include this payer with printing statements, that are available to review and change. These options default in accordance with your system settings, so they only need adjustment if this particular patient has unusual billing requirements. These options can be found on the payer’s detail screen (Billing Lookups > Patient (Self) Payers). That screen looks just like the screenshot shown in the section just below this one.

Add a Parent or Other Third Party as a Payer on the Patient’s Account

To add a parent or other third party to a patient’s Non-Insurance Payers list, you must first add the payer to the master list of Non-Insurance Payers. Once that has been done, you can add the new payer to the patient’s list.

  1. On the left hand Navigation Bar, expand Billing Lookups.
  2. Select Non-Insurance Payers. The list should open on the right.
  3. Click the New icon at the far left of the top toolbar. A blank Non-Insurance Payer screen should open. Remarks about completing this form appear below the screen image.

Remarks

  • This Payer Is A
    Select either “Person” or “Organization”. If you select the “Organization”, then the three name fields will be replaced with just Organization Name.
  • Show This Payer in All Datasets
    Un-check this option if the payer should be displayed only in the current dataset. For example, if the current payer is a parent, you will not want the payer to appear in any other datasets. On the other hand, if the payer is a public one, such as an attorney or a public agency or department, it may be appropriate to have the payer available for use in all of your datasets. When in doubt, SOS recommends that you leave this option un-checked.
  • Sent To Collections On
    If you employ and outside collections agency, and this payer account has been turned over to that company, then enter the date that occurred in this field. In the future you may want to know when that action took place. In addition, SOS will suppress additional statements for this account once it has become the responsibility of your collections agency.
  • Optional GL Account #
    If you plan to export Accounts Receivable data from SOS to an external General Ledger Accounting package, you can enter the appropriate account identifier from that package in this field.
  • Payer Communications
    Add all desired mailing addresses, phone numbers, and email addresses in this Communications panel. These are added in exactly the same way as in the Patient screen. For details, refer to Entering a New Patient, Step 3: Patient Communications .

Additional Non-Insurance Payer Tabs

The Non-Insurance Payer screen includes several other useful tabs:

  • Patient Accounts
    Select the Patient Accounts tab to see Accounts Receivable data for each patient for whom the current payer is responsible. For example, if the current payer is the father and payer for each of three children, look at the Patient Accounts tab of the father’s Non-Insurance Payer screen to see a row for each of the children, detailing the date last billed, the aged balances, and other related information.
  • Checks, Credit Cards, EFT, Cash, Other
    There is a separate tab for each type of payment, so you can see the details of all the payments that have been made without having to comb through each related patient ledger. Each tab displays information appropriate to that type of payment.

Entering a New Patient, Step 4: Contacts

You can enter an unlimited number of Contacts, such as family members and other treating healthcare providers, in the Contacts panel in the lower right corner of the Main tab of the Patient form.

To add a new contact to the list, click the New icon, or click anywhere in the Contacts panel and press <CTRL><N>.

Last Name on the Contact form is a required field. SOS recommends that you specify a Contact Type from the associated lookup list. There is a New button at the bottom of that list if the type you need is not already on the list.

At the bottom of the Contact form is a Communications panel in which you can add as many phone numbers, mailing addresses, and email addresses as you like.

Previous: Entering a New Patient, Step 3: Patient Communications

Related Articles:
Entering a New Patient, Step 1
Entering a New Patient, Step 2: Basic Demographic Data Fields

Managing Patient Insurance Payers
Managing Patient Non-Insurance Payers
Managing Patient Care Episodes
Managing Patient Posted Charge Entries
Managing Patient Posted Payments and Adjustments
Recording Patient Psycho-Social History
Managing Billing and Clinical Documents for a Patient
Creating a Patient Treatment Plan
Recording Progress Notes
Recording Prescriptions
Recording Allergies
What Are User-Defined Fields?

Entering a New Patient, Step 2: Basic Demographic Data Fields

You can enter the basic patient demographics from any of the patient lists: Patients (All Tabs), Patients – Billing, Patients – Clinical, or of course, Patients – Demographics.

After opening one of the patient lists, click the “New” icon at the left of the top tool bar.

Just the heading area of the patient form will appear.

The ID field will default to a unique number value, but you can turn that feature off if you would rather manually enter your own alphanumeric identifiers for each patient. In addition, you can specify the range used for the auto-numbered IDs. See Specifying System Options for more details.

Continue through the remaining fields. It is just first and last names that are required, but it is strongly recommended that you specify the patient’s date of birth as well. Note that Age is automatically calculated based on the DOB and the system’s internal Patient # as well as the description of the patient’s initial care episode are both generated automatically. You will be able to change the care episode description after saving this initial data if you choose. (See Managing Patient Care Episodes for details.)

When you are finished, click the Save button on the top toolbar, or use the <CTRL><S> hotkey.

The rest of the Patient Form will immediately appear, so you can continue in the next panel with Sex, Marital Status, Race, and so on. With the exception of Years of Education and Notes, all of these fields have lookup lists to make data entry fast, easy and consistent. Note that these lookup lists include a “New” button in the lower right corner so you can quickly add new selections to these lists as needed.

That brings us to the next step, entering the patient’s address, phone, and email information. See the next article in this series, Entering a New Patient, Step 3: Patient Communications.

Previous: Entering a New Patient, Step 1
Next:
Entering a New Patient, Step 3: Patient Communications

Related Articles:
Entering a New Patient, Step 4: Contacts

Managing Patient Insurance Payers
Managing Patient Non-Insurance Payers
Managing Patient Care Episodes
Managing Patient Posted Charge Entries
Managing Patient Posted Payments and Adjustments
Recording Patient Psycho-Social History
Managing Billing and Clinical Documents for a Patient
Creating a Patient Treatment Plan
Recording Progress Notes
Recording Prescriptions
Recording Allergies
What Are User-Defined Fields?

Entering a New Patient, Step 1: Open the Appropriate Patient Form


Note: This article describes the complete, detailed method used to enter a new patient, including all patient details (for example: unlimited street addresses, email addresses, patient contacts, payers and insurance policies, plus much, much more). There is an alternate “Quick Add” feature that allows you to rapidly initialize a patient record with the basic data on a single screen. You can then use the full interface to enter additional information at a later time. See Using Quick Add to Rapidly Create a New Patient Account for more information.


All information related to patients can be entered and reviewed from each patient’s main screen. To view, modify or add a new patient with access to all patient data, go to Patients in the navigation pane on the left of your screen, then select Patients which is the gateway to the complete Patient screen, containing all data tabs.

There are also more specialized patient lists that show just the basic demographics (Patients – Demographics), demographics plus billing-related data (Patients – Billing), or demographics plus clinical records (Patients – Clinical). The patient form accessed from each of these lists calls up a different variation of the entry screen, tailored to different types of users, with different data entry needs. The top of the patient screens are all the same, but differences are reflected in the tabbed section at the bottom:

Patient (All Tabs):

Patient – Billing:

Patient – Clinical:

Patient – Demographics:

Next: Entering a New Patient, Step 2: Basic Demographic Data Fields

Related:
Entering a New Patient, Step 3: Patient Communications
Entering a New Patient, Step 4: Contacts
Managing Patient Insurance Payers
Managing Patient Non-Insurance Payers
Managing Patient Care Episodes
Managing Patient Posted Charge Entries
Managing Patient Posted Payments and Adjustments
Recording Patient Psycho-Social History
Managing Billing and Clinical Documents for a Patient
Creating a Patient Treatment Plan
Recording Progress Notes
Recording Prescriptions
Recording Allergies
What Are User-Defined Fields?