The following instructions are specifically for SOS Release 2016.
- First, it is necessary to create a user account in the Admin Module (Users and Passwords) that has query rights. Once at the User List, click the Query Users tab and add a new account. Keep in mind that although Query Users cannot change any data in the database, they do have sufficient rights to see most everything stored in it. In addition, their rights would allow them to export virtually all your patient data. ONLY create Query User accounts for staff who are have your absolute trust! In addition, do not use a super-user account for routine data queries! Using super-user accounts for queries could result in accidentally making disastrous changes to the database. Instead, create a separate, more limited, Query User account for super-users who want to query data in the database.
- Launch the provided query utility by doing Start > Programs > SOS Applications > DBISQL. (An alternate, somewhat less user-friendly version can be launched by Start > Programs > SOS Applications > DBISQLC.)
- When prompted, type your Query User ID and password (remember that passwords are case-sensitive) in the appropriate fields on the LOGIN tab, then next to ODBC Data Source select or type “SOSDATA” and click OK.
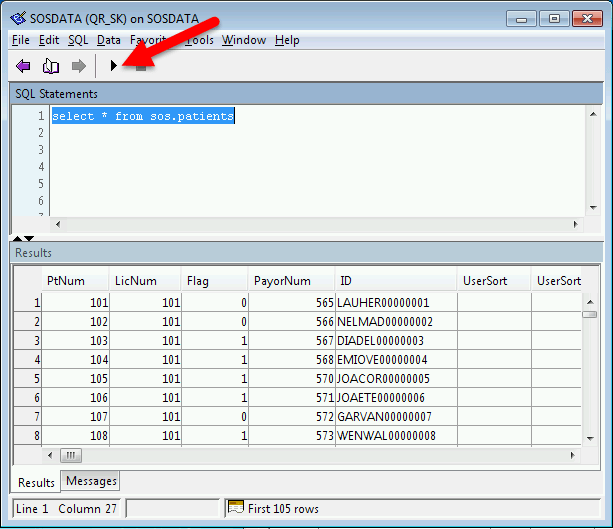
- A screen with multiple windows will open. Type your query in the Command (DBISQLC) or SQL Statements (DBISQL) window and click the Execute button (or press <F9> in either version).
Using the DBISQL version, use Data > Export to save your results in a file. In either version you can add a line to query to do the same. Add a semicolon, then an OUTPUT statement to the query. The following simple query creates a list of patients along with their email addresses and saves it in a “web page” file in the SOS folder called “pt-emails.html”. This HTML file can be viewed in your web browser, or opened, manipulated, and printed using Microsoft Excel:
SELECT lastname, firstname, email
FROM sos.rv_patients
ORDER BY lastname, firstname
; OUTPUT TO c:\sos\pt-emails.html FORMAT HTML
You are not limited to HTML output, by the way. In the example above, the results are output in HTML format because of the keyword HTML after FORMAT. By changing the keyword, you can choose from an assortment of output file formats. Among the formats available for your query results are the following:
| Format | Suggested filename extension (type) | Keyword | Comments |
| Plain text | TXT | TEXT | The output is a TEXT format file with one row per line in the file. All values are separated by commas, and strings are enclosed in apostrophes (single quotes). The delimiter and quote strings can be changed using the DELIMITED BY and QUOTE clauses. If ALL is specified in the QUOTE clause, all values (not just strings) are quoted.TEXT is the default output type. This output format used to be called ASCII in previous versions of DBISQL. |
| Fixed width columns | TXT | FIXED | The output is fixed format with each column having a fixed width. The width for each column can be specified using the COLUMN WIDTHS clause. No column headings are output in this format. |
| Web page | HTM or HTML | HTML | Open with your web browser. Also can be loaded in Excel and some other spreadsheet applications. |
| XML web browser format | XML | XML | Some programs and systems can import and/or process data in XML format. |
Note that you can leave off the OUTPUT statement entirely and export using the menu DATA > EXPORT at the top of DBISQL. HTML is still the suggested format, however. You can display it in your browser by double-clicking, or open and manipulate the file containing the result set using Excel.

You can save this query with a name by clicking File > Save and run it whenever you want by opening DBISQLC or DBISQL and clicking File > Open to recall it. By convention, queries like this are given names ending in SQL, like EMAILS.SQL, for example. I would suggest that you save it in your SOS folder so you don’t lose it. If you really want to get fancy, you can create a shortcut on your desktop to run your query with one double click (plus typing in your ID, etc. when prompted):
“C:\SOS\SA\bin32\DBISQLC C:\SOS\EMAILS.SQL“
or
“C:\SOS\SA\bin32\DBISQL C:\SOS\EMAILS.SQL”
Documents you may find helpful include the rather dated, but still relevant, annotated data dictionary: https://www.sosoft.com/files/downloads/sosddct.pdf
and a set of entity diagrams showing links among tables for the most commonly used data: https://www.sosoft.com/files/downloads/sosdpics.pdf
It is most important that you review the final chapter (Accessing SOS Data from Other Programs) in sostech.pdf, located in your SOS folder. This chapter explains the basics of the database organization. You will be lost in doing anything beyond the simplest queries without that foundation.
